
iFunia Video Converter for Windows is a comprehensive video manager tool that helps you rip standard/blu-ray DVDs, convert video files, download online videos, compress videos and edit videos. It supports 1000+ video formats, including the most popular video/audio formats MP4, AVI, MKV, MOV, WMV, MP3, M4A, FLAC, AAC, WAV, etc. In addition, it supports downloading videos and music from 1000+ websites, like YouTube, Dailymotion, Twitter, Facebook, brightcove, etc. In this guide, we will introduce all the features for iFunia Video Converter to help you get started.
Part 1 Download & Install
1. You can download the installation package of iFunia Video Converter from the below link.
 Free Download Windows 11/10/8/7
2. Install iFunia Video Converter with the downloaded package.
Double-click the .exe file to run it.

Select a folder to install the program (It is recommended to save it under D: drive instead of C: Drive)
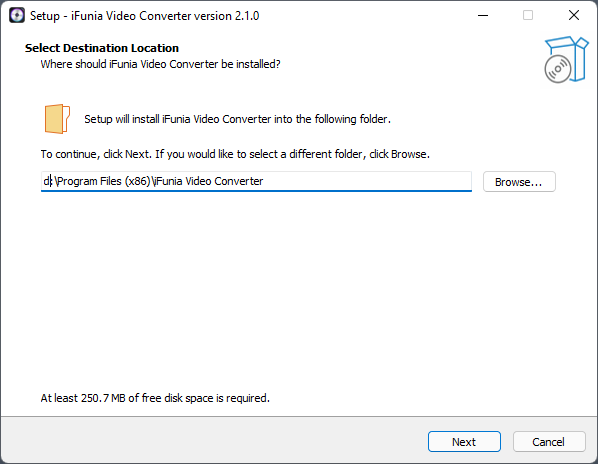
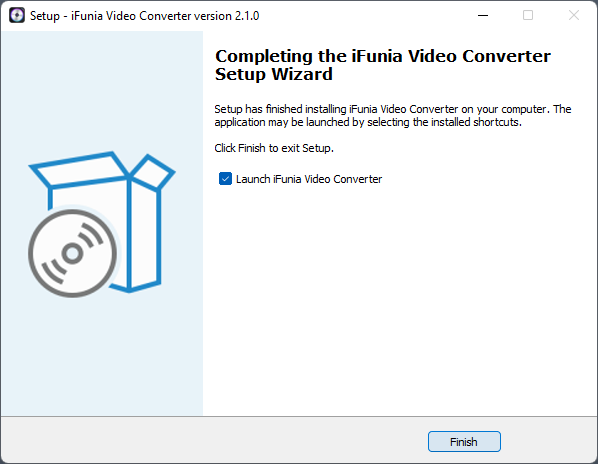
Click Next > Next > Install to continue the installation process, when the below window appears, it means that the program has been installed successfully.
Part 2 Activation (Optional)
After installing the program, you need to activate the program if you want to use the full version features.
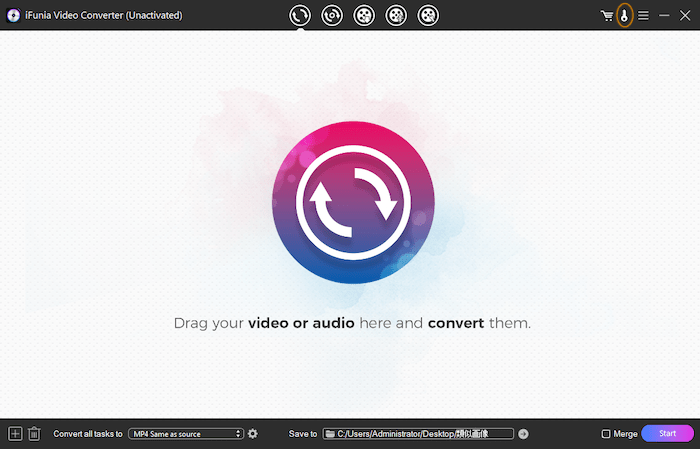
1. Find iFunia Video Converter on your desktop or in the folder where you installed it, double click to run it, and then click the key icon at the right upper corner
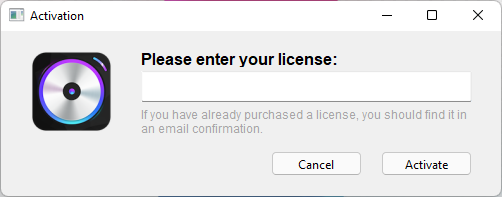
2. Copy-n-paste the license code into the popped-up window, click Activate.
Part 3 Video Converter
Ready to say goodbye to all the video format fuss? iFunia Video Converter lets you easily convert video files in minutes.
Step 1 Add videos
Select the Convert tab, and then you can import videos by dragging or dropping or clicking  at the left lower corner of the main interface.
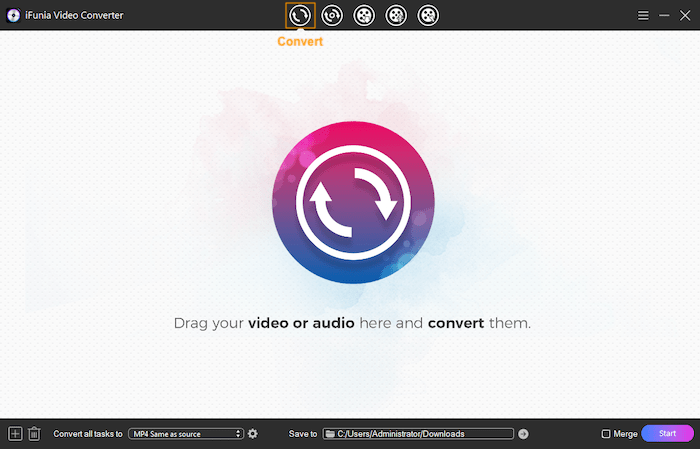
If you want to remove the added video files, you can just highlight the target videos, click  or press the "Backspace" key on your keyboard.
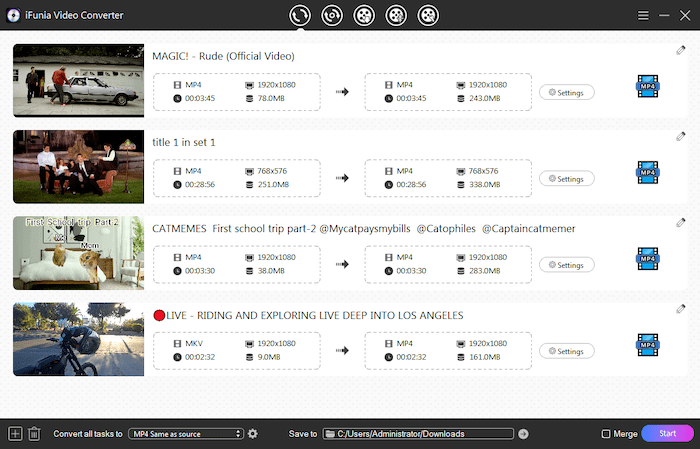
Step 2 Select a target Output format
Click  , select an output format that you'd like to. If you want to convert multiple videos to the same format, you can directly click "Convert all tasks to" to select your desired format.
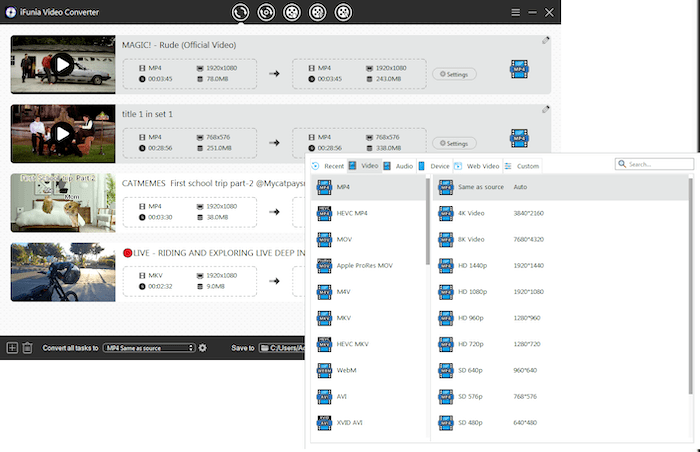
Click  or
or  , it will bring you to an Advanced Settings window, you can change encoder, resolution, frame rate and quality for your video and audio.
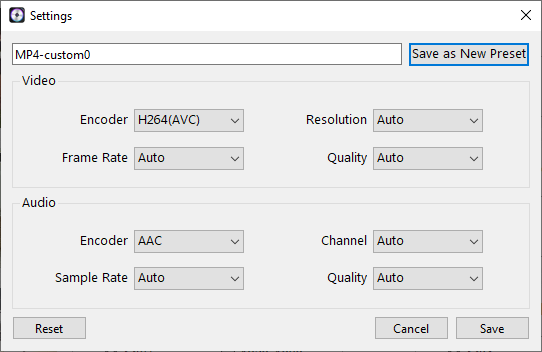
If you use this setttings usually, you can click  to save your custom settings for your further use.
Step 3 Edit the video (Optional)
You can click  at the right upper corner of the video to get into the edit window to make any changes as you need. You can check Video Editor for more details.
Step 4 Select a location through "Save to" to save the converted file, and then click  to start the conversion.
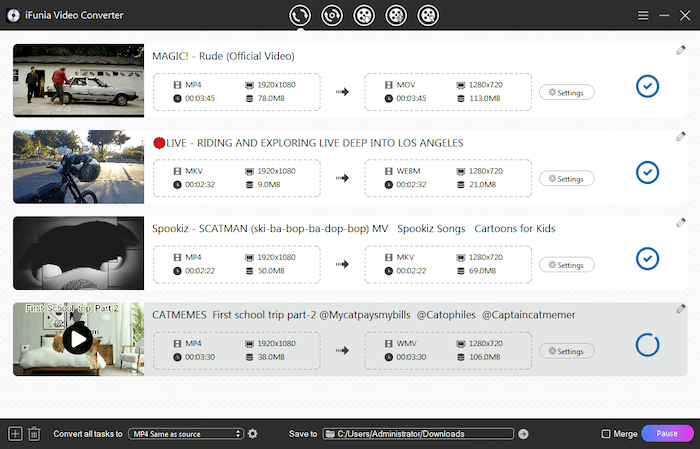
Tips:
1. You can directly click  after the video to directly access to the converted video.
2. If you want to generate one video to combine all the videos in, just check on  before clicking the convert button.
Please note that when you check on the Merge button, please click "Convert all tasks to" to choose or change the output format.
Part 4 DVD Converter
We may have some old but good memories that were recorded in the DVD disc, however with the popularity of digital files, it is more and more difficult to find a DVD player to play a DVD disc. So digitalize the DVD discs may be a good solution to keep your good memories, no matter what type of DVD, iFunia Video Converter can convert it.
Step 1 Add DVD/blu-ray DVD
Navigate to the Rip tab, you can directly drag and drop the DVD folder into the blank place of the main interface or click  at the left lower corner of the main interface.
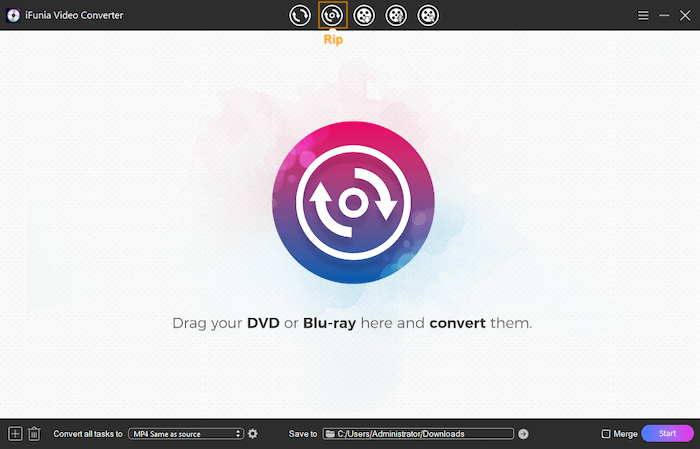
After loading all the titles of your DVD or Blu-ray, you can also remove the titles that you don't want to rip. Just highlight the target titles, click  or press the "Backspace" key on your keyboard.
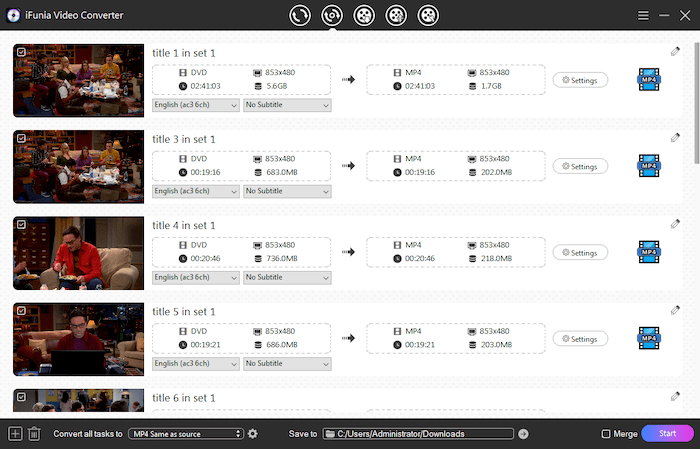
Step 2 Mark the titles you want to convert
Normally a DVD contains several titles in it, the main titles and some short titles. You are allowed to select the titles you need to convert by ticking the check box at the left upper corner of the thumbnail.
Tips:
1. When a DVD had multiple audio tracks and subtitles, you are only allowed to select one audio track or subtitles to rip, please correctly select the audio track and subtitles after loading the DVD disc.
2. Right click one of the titles, you can choose to check all/uncheck all the titles.
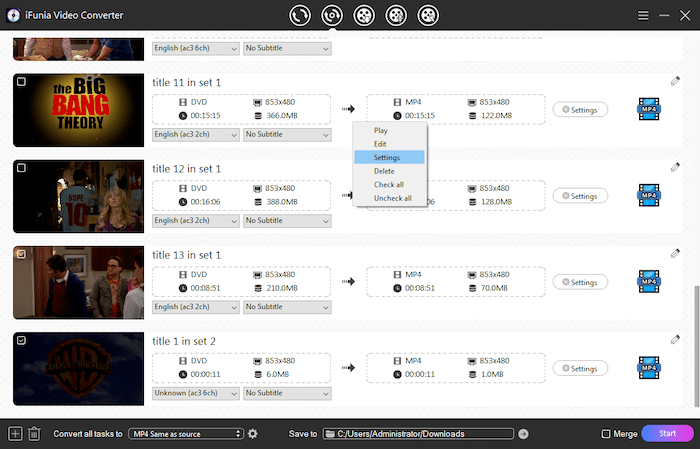
Step 3 Select an Output format
There are various output video formats supported with iFunia Video Converter, just click the "Convert all tasks to" to select your desired format.
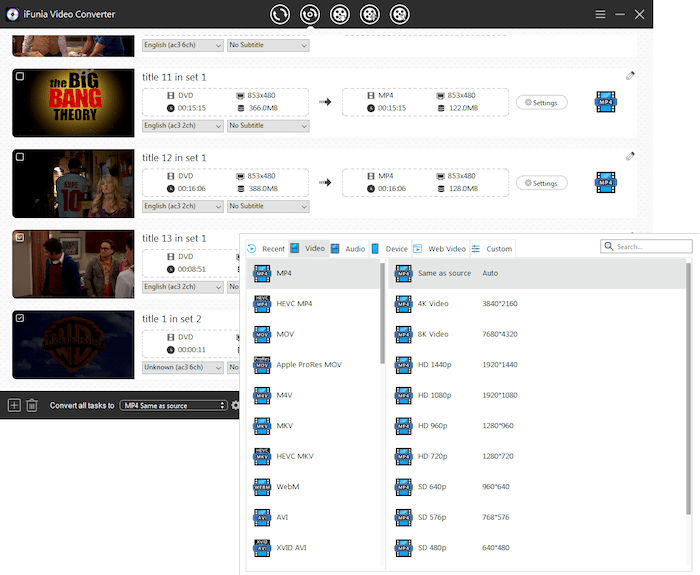
Step 4 Select a location through "Save to" to save the converted file, and then click  to start the conversion.
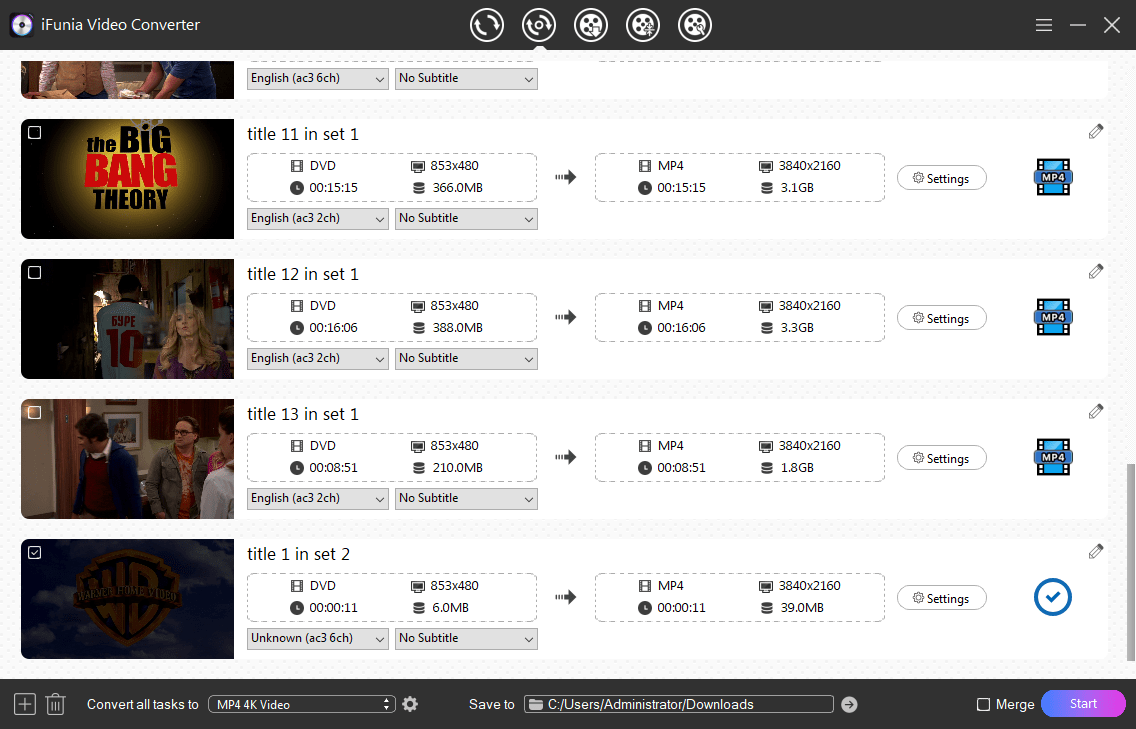
Tips:
1. You can directly click  after the video to directly access to the converted video.
2. If you want to generate one video to combine all the videos in, just check on  before clicking the convert button.
Please note that when you check on the Merge button, please click "Convert all tasks to" to choose or change the output format.
Part 5 Video Downloader
iFunia supports downloading videos and musics from 1000+ video-sharing sites, including YouTube, Facebook, VEVO, Vimeo, Dailymoon, etc.
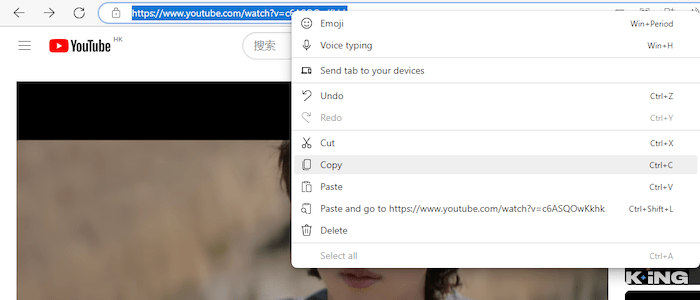
Step 1 Copy the video links/URLs from video website.
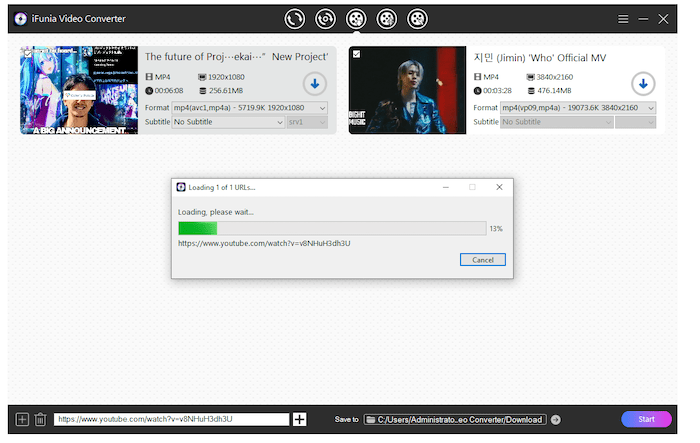
Step 2 Navigate to the Download tab, paste the link/URL into the address box, press Enter on your keyboard or click  after the address box, Cisdem Video Converter will start loading the video's information and display on the interface.
Tips:
1. In addition to the URL of individual video, you are allowed to paste the URL of playlist to directly download the videos from a playlist.
2. If you need to paste URLs in bulk, you can click 
 at the left lower corner of the main interface, and then paste the URLs in the following blank box. Please paste one URL per line, and you can switch to a new line by pressing Enter on your keyboard.
3. If the video that you wants to download requires login, please confirm your default browser has logged in the account before loading the video.
Step 3 Select an output format you'd like to download.
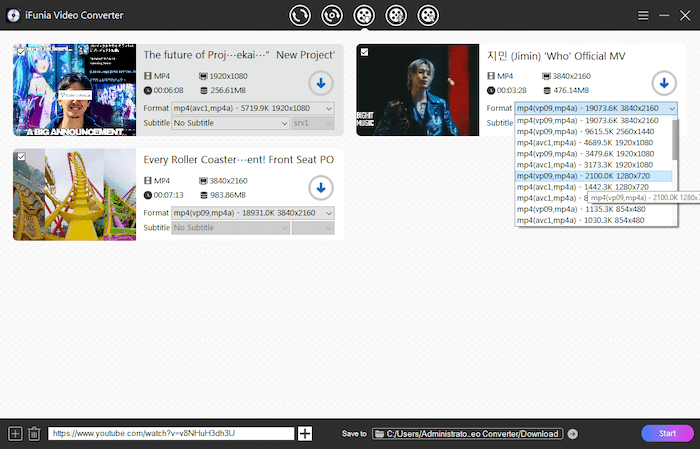
Step 4 Download the YouTube videos
Select a location through "Save to" to save the downloaded videos and click  to start the downloading. You can also directly click
  after the video to access to the downloaded videos.
Part 6 Video Compressor
Too large to upload your video file to website or send via an email? Reduce the video size to any size you want with iFunia Video Converter.
Step 1 Add files
Navigate to the Compress tab, you can directly drag and drop video files into the program or click  at the left lower corner of the main interface to add video files into the program.
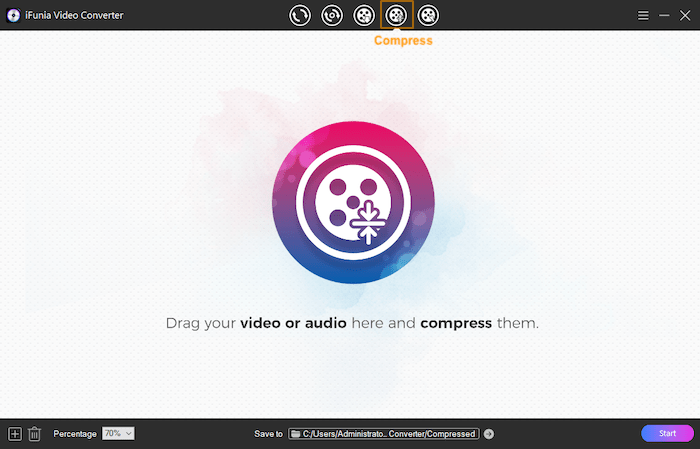
After adding the video files, you can click the Play icon on the thumbnail or right click the video to play the video file. Also you can click  , press the "Backspace" key on your keyboard or right click the video to delete the wrongly added video.
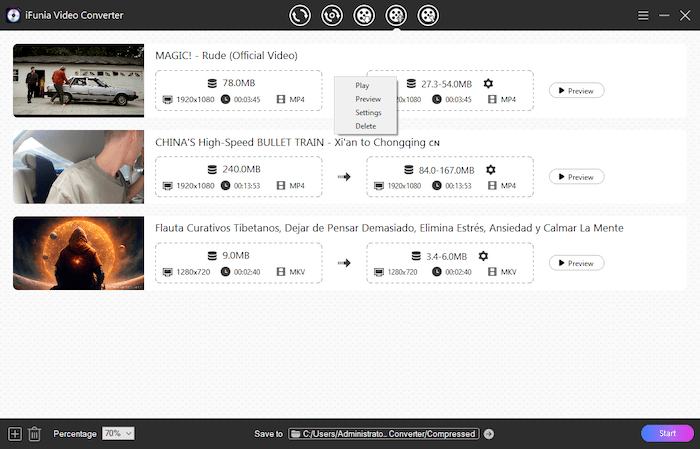
Step 2 Select a file size you want to compress to
1. Quick Compress: You can directly click  to select a proper percentage you want to compress for all the imported video files.
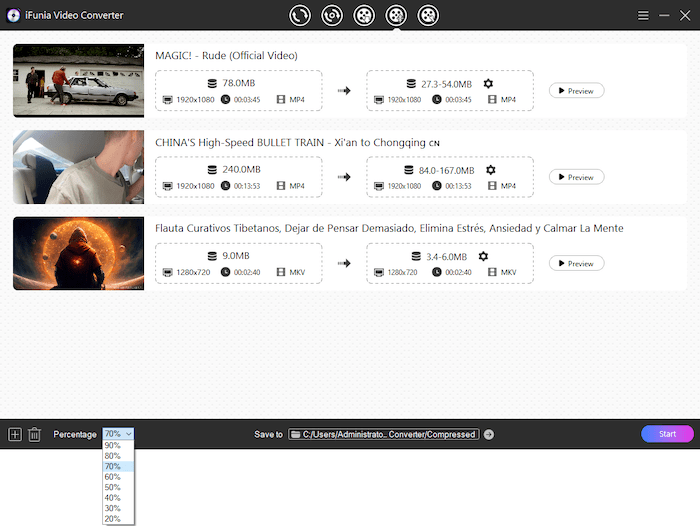
2. Advanced Compress: You can click  to get into the advanced setting window to select a file size and parameter for each video file.
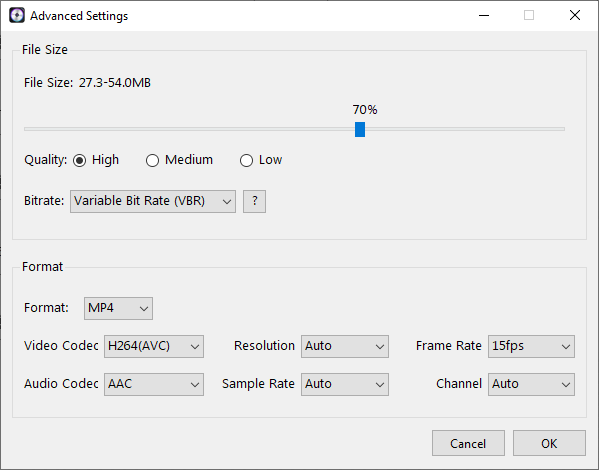
3. Preview compressed video: After selecting the file size, you can click  to check the compressed video.
Step 3 Select a save location and start compressing.
Select a proper location through the "Save to" option, click  to start compressing all the video files.
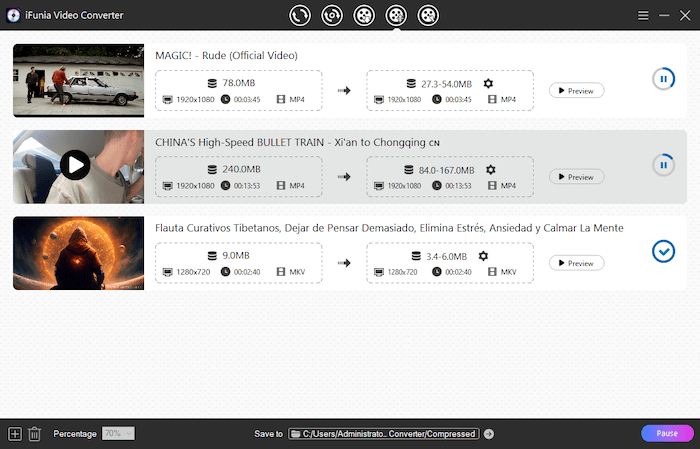
Tips: You can directly click  after the video to directly access to the compressed video.
Part 7 Video Editor
Besides converting videos, with iFunia Video Converter, you can also edit the videos when you need. You can directly navigate to the Edit tab and add the video files into the program or under the Convert/Rip tab, click  at the right upper corner of the imported video to get into the Edit window, customize your video file as you like, save the changes and click
  to start proceed.
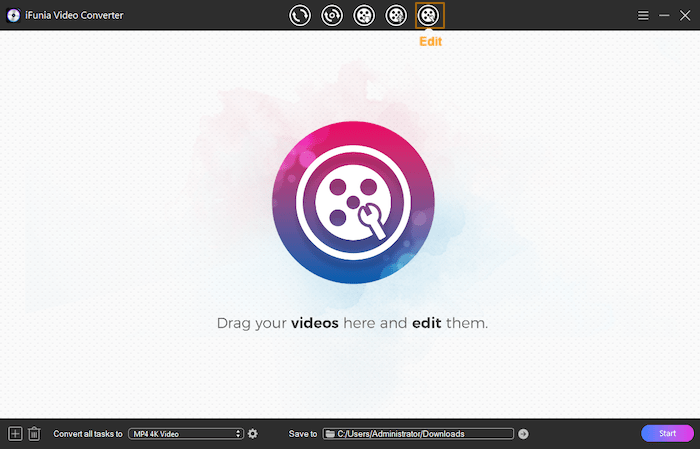
The edit tools includes Trim, Crop, Rotate, Watermark, Effects, Subtitle, Chapter and Volume, below are the detailed descrption for all the tools.
a. Trim
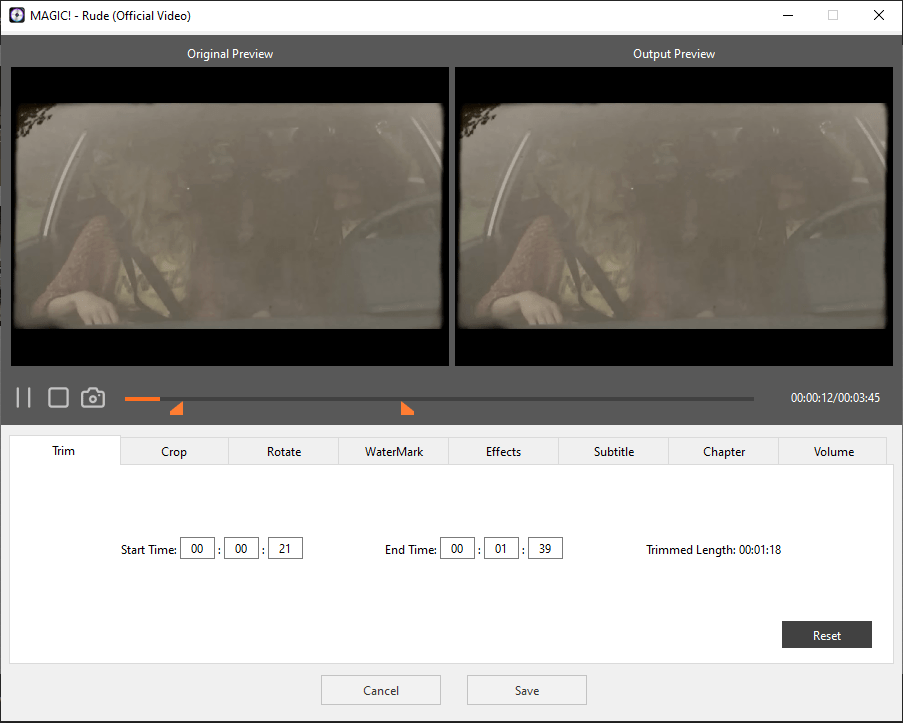
1. After entering the Edit window, it will play the video file automatically, you can move  and
and  of the playback progress bar to choose a specific part of the video.
2. You can also manually enter the Start Time and End Time to confirm the clip to be trimmed.
3. To reset the start and end time back to the original, just click 
b. Crop
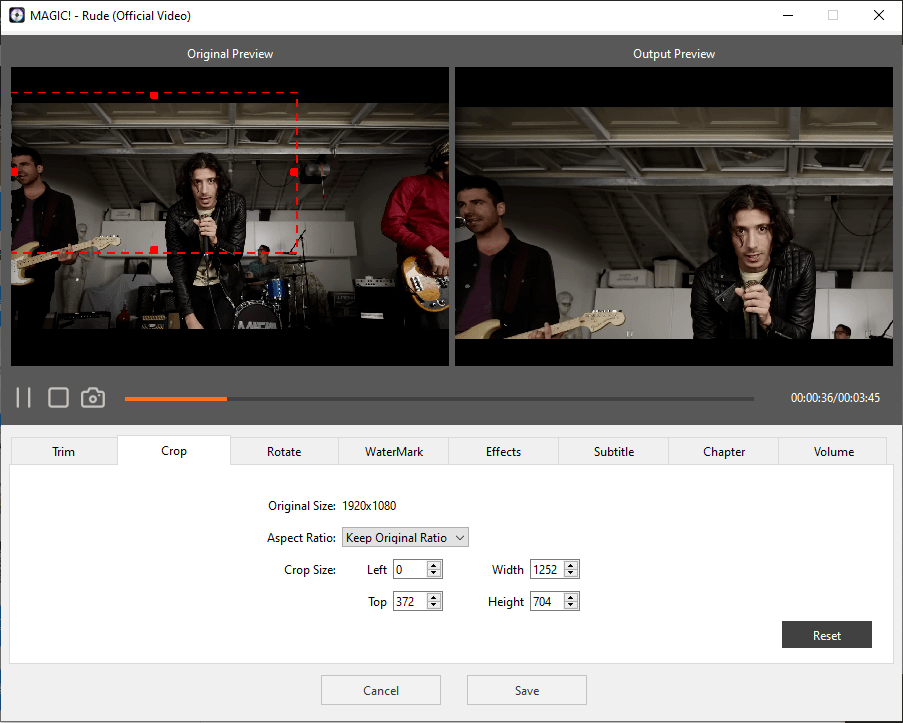
1. Navigate to Crop tab, you can manually adjust the cropping area by dragging the central and surrounding handles.
2. You can also adjust the size and position of cropping area by changing the figures in those four boxes.
3. You can select an output aspect ratio for cropping with four options: Keep Original Ratio, 16:9, 4:3 and Any.
4. To reset the video back to the original, just click 
c. Rotate
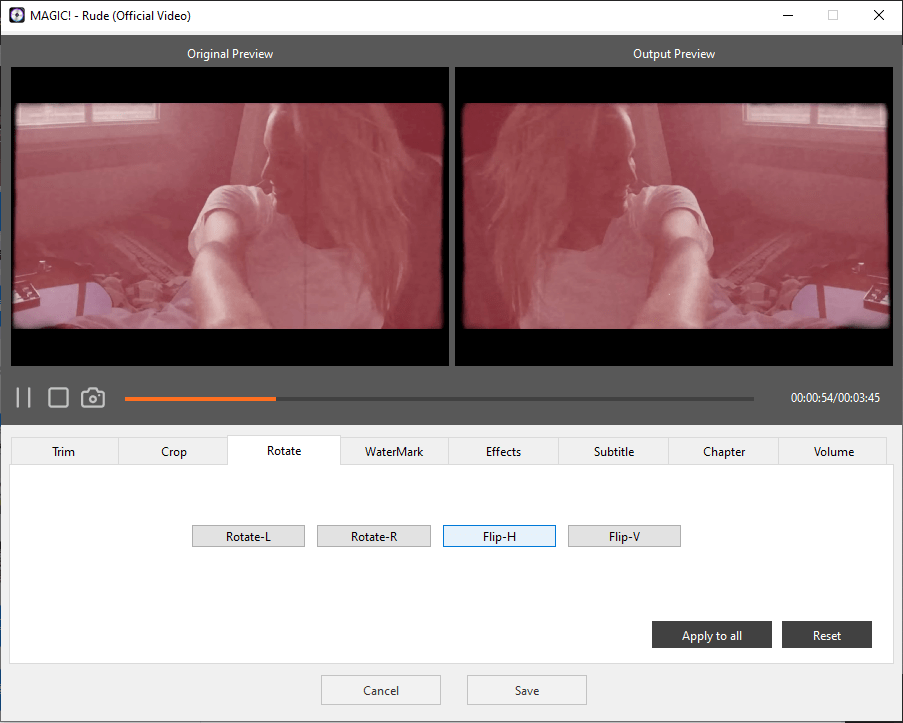
1. Navigate to Rotate tab, each of the four buttons specifically represents one specific way to rotate or flip the video, click the button as your requirement.
2. To reset the video back to the original, just click 
3. If you want to apply the rotate to all the imported video files, you can just click  to apply the rotate effect to all the imported video files.
d. Watermark
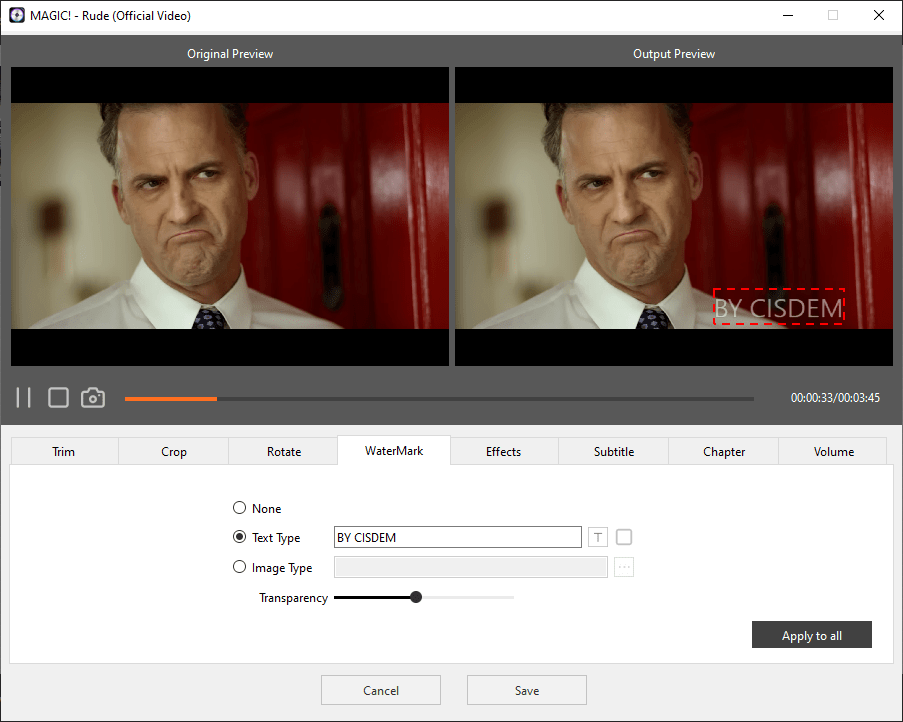
1. Navigate to Watermark tab, you are allowed to add any text watermark or image watermark to the video.
2. Text watermark: select the "Text type", type the content in the box, pick its font and color by clicking  and
and  , and set its position and degree of transparency.
3. Image watermark: select the "Image type", click  to choose the image to be used as a watermark, and set its position and degree of transparency.
4. If you want to use the watermark on all loaded videos, you can click  after finishing the watermark.
e. Effects
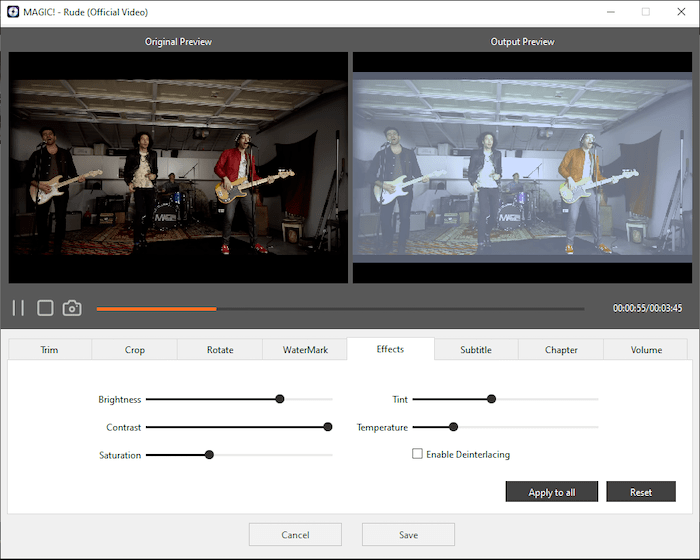
1. Navigate to Effects tab, set the degrees of Brightness, Contrast, Saturation, Tint, Temperature by resetting their respective control sliders.
2. In this section, you also can find the deinterlacement feature, which can turn interlaced videos into a non-interlaced form, enhancing spectators viewing experience rather appreciably. And it is also quite easy to use. Just need to check the box of "Enable Deinterlacing".
3. To cancel all the effects and reset the video back to the original, just click 
4. If you want to use the same effects on all loaded videos, you can click  after finishing the settings.
f. Subtitles

Navigate to Subtitle tab, and then you are able to select embedded subtitles the video includes or import an external subtitle files from your local drive.
Tips: iFunia Video Converter supports .srt, .ass and .ssa subtitle files.
g. Chapter
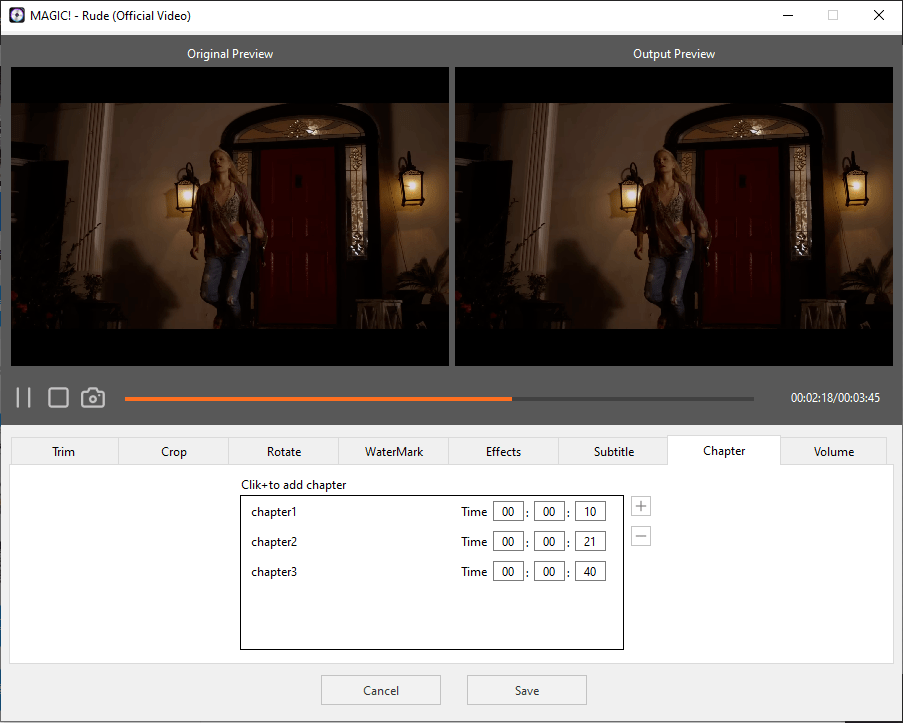
Navigate to Chapter tab, click  , fill in the end time, press "Enter" on your keyboard to confirm your filling, then Chapter 1 has been created. You can also add chapter2 or more chapters in the same manner.
Tips: Cisdem Video Converter can not only create chapters, but also recognize the chapters that you created in another video editor program. You will just need to get into the Chapter section, and then Cisdem will auto recognize the chapters and display them in the chapter box.
h. Volume
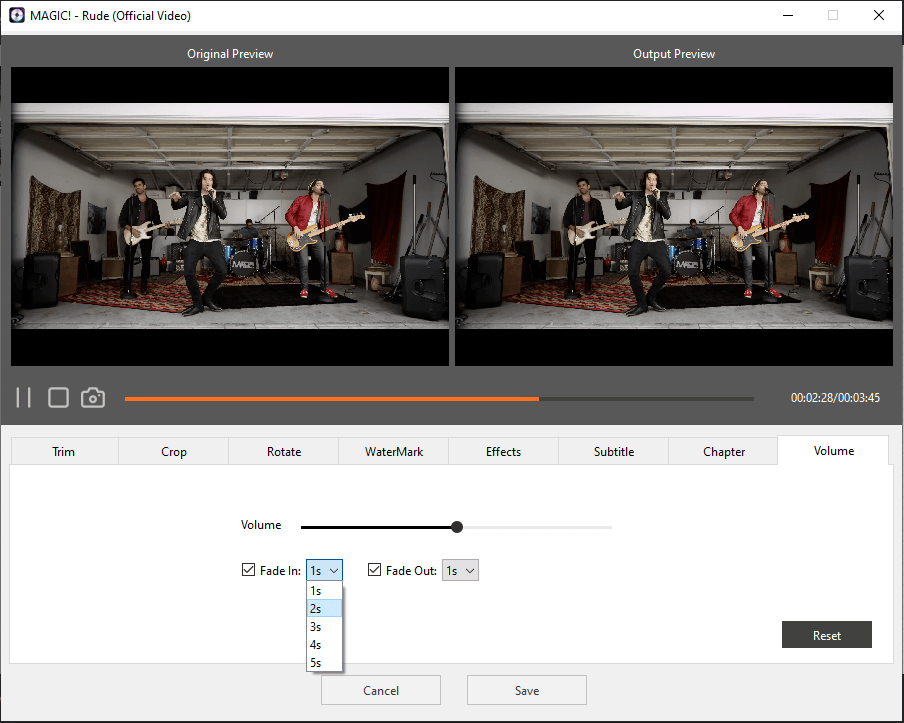
1. In some cases, the voice of the original video is too loud or too low, if you want to adjust it, you can navigate to Volume tab, slide the volume bar as you like.
2. In addition, if you want to add “Fade In” effect at the beginning of the video or add “Fade Out” effect at the end of your video, tick the option “Fade In” or “Fade Out” and then select the duration.
Part 8 Update Application
We always suggest users can keep using the latest version of the program.
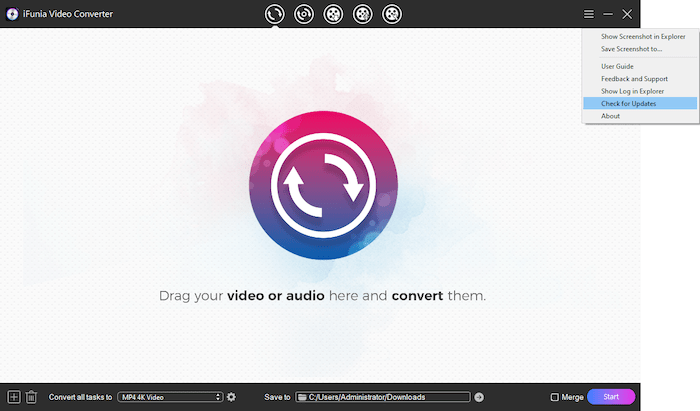
When you launch iFunia Video Converter, iFunia will auto check for updates.
Also, you can click  > Check for Updates to manually update it.

Jessica Nielsen has worked in iFunia for 8 years, she is very familiar and professional with video parameters and iFunia’s programs, and can provide accurate and useful suggestions to iFunia users.