
VLC media player is known for its versatility and wide range of supported media formats. It’s not limited to playing media files, but can also be used as a powerful tool for converting video, audio and even DVDs. VLC uses libdvdcss to access DVDs with region code and CSS restrictions. But the ripping feature of VLC is quite uncontrollable and often cause errors including but not limited to: no subtitles, missing audio, degraded video quality, rip menu only/no menu, sudden freeze, etc.
This article will show you step by step how to rip a DVD using VLC on your computer, and avoid potential problems as much as possible. But if you want to solve the issues once and for all, we strongly recommend using a dedicated DVD ripper that provides more control over a successful DVD rip.
 Free Download Windows 11/10/8/7
 Free Download macOS 10.11 or later
It’s important to note that VLC cannot rip all the titles of a DVD in one go, you need to tell VLC which title(s) or chapter(s) you want, as well as the audio tracks and subtitles. This is especially important when you’re ripping a DVD with multiple titles. Perform following steps to find the correct title(s) and tracks before ripping:
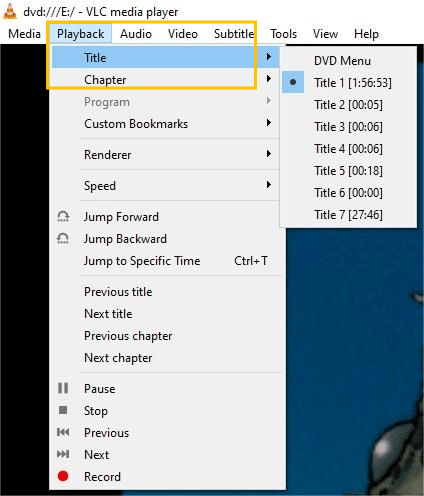
Step 1. Access the DVD ripper function of VLC.
Open VLC and press Ctrl + R combination on your keyboard, and go to the “Disc” tab.
Step 2. Add DVD source and edit options.
Select the DVD inserted as the “Disc device”, and check the “No disc menus” option to avoid ripping a loop menu. Set the correct title as the “Starting position”, and select the audio and subtitle tracks. Then click on the “Convert/Save” button to proceed.

Step 3. Output settings.
In the “Convert ”window, choose an output format you want from the “Profile” list. H.264+MP3 (MP4) is a highly compatible option. Then click “Browse” to enter a file name and specify a destination folder where you want to save the ripped DVD.
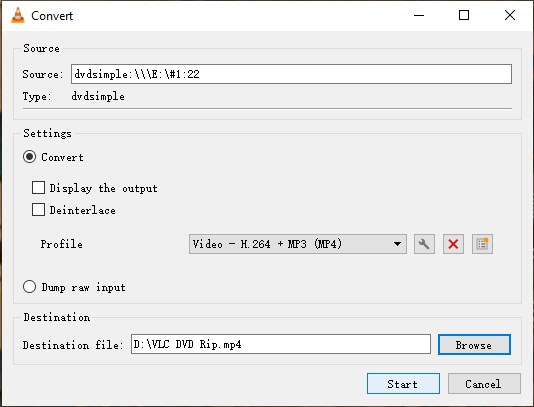
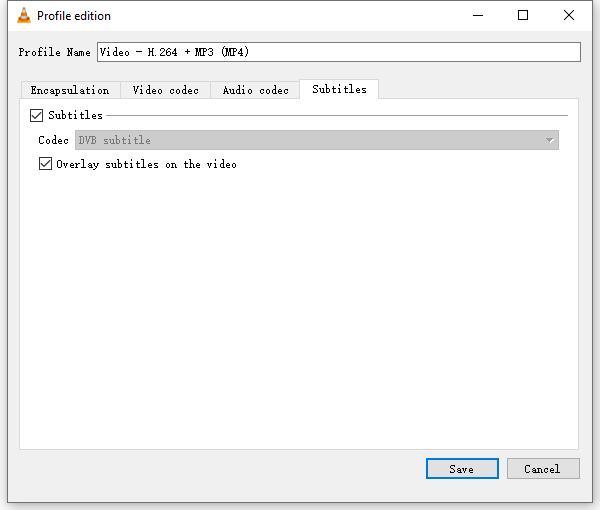
*If you want to embed subtitles onto the video, click the wrench icon to the right of the Profile field. Then click the “Subtitles” tab and check both the “Subtitles” and “Overlay subtitles on the video” options.
Step 4. Initiate the ripping process.
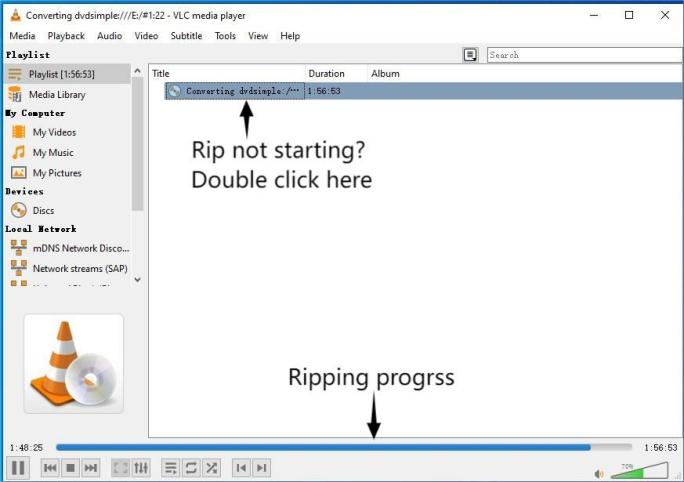
Click “Start” to begin the ripping process. VLC will display the progress in the progress bar at the bottom of the interface.
The Mac version of VLC does not support selection of audio track and subtitles when ripping DVD. It usually rips DVD with the main audio track with no subtitles.
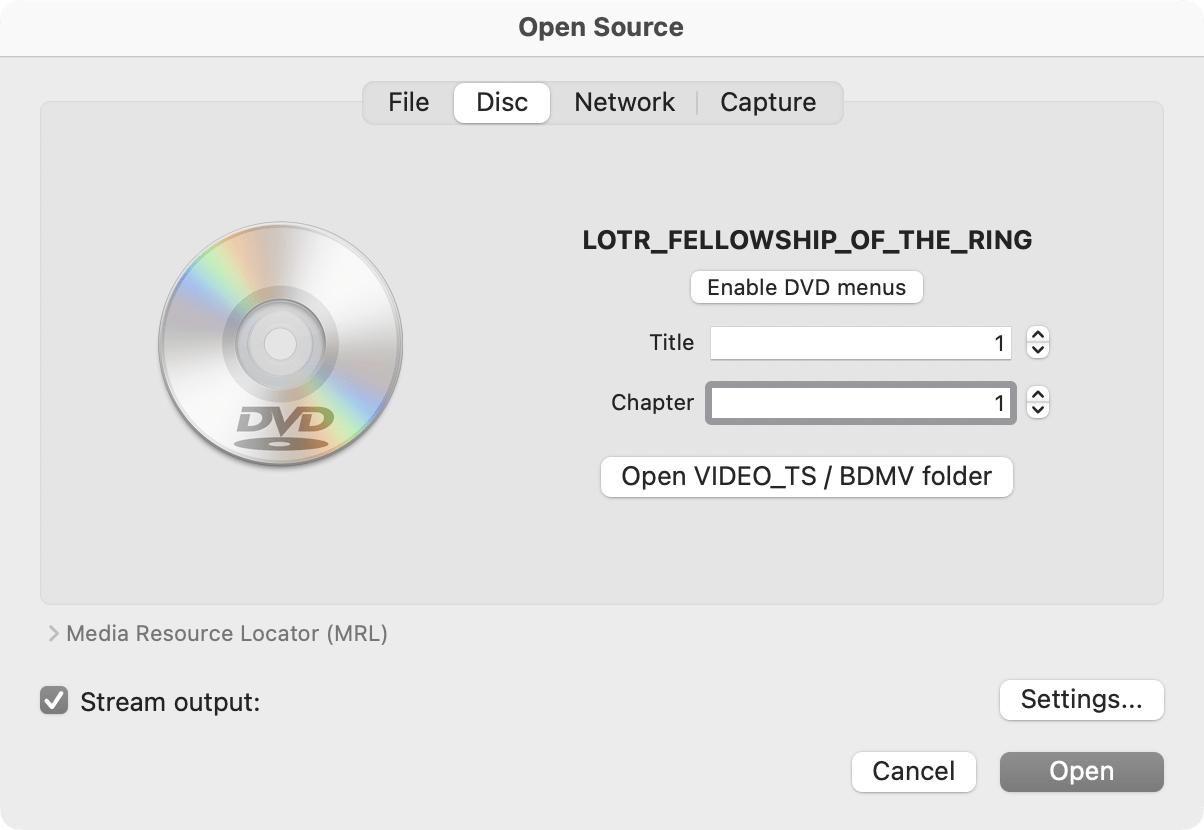

*Normally you only need to configure the video and audio codec and VLC will autodetect other parameters like "bitrate" and "scale".
Once the ripping process is complete, you can verify the ripped video in the specified folder, or continue to convert the next title you need.
Q1: Can VLC rip DVD with subtitles?
Hardly. According to our testing results, VLC either rip the disc without subtitle or overlay multiple subtitles of all language on the video. And the Mac version doesn’t support this feature at all. It may vary from disc to disc, so testing is the quickest way to find out. Select a short title or chapter and try it out. If VLC doesn’t work, use a better ripper program such as HandBrake.
Q2: Can VLC rip DVD with the menu?
No. It won’t keep the menu structure. If You don’t disable the DVD menu option, VLC will convert the DVD main menu to a video file like a title, but you can’t click the menu buttons and the sub menus are missing. To preserve the menu function and disc structure, you need to copy DVD to an ISO image file or Video_TS folder using a free DVD copy software.
Q3: How long does it take to rip a DVD with VLC?
The speed is not too slow, the fastest VLC can rip a standard 2 hour DVD movie in half an hour. It may take longer depending on your configuration parameters.
Q4: How do I use VLC to rip a TV series DVD with multiple episodes?
If there is a main title that combines all episodes, you can rip it to a single file like a movie. If you want to rip each episode as separate files, rip all titles you need manually by repeating above steps.
Q5: How to fix VLC freezing or not working errors during DVD ripping?
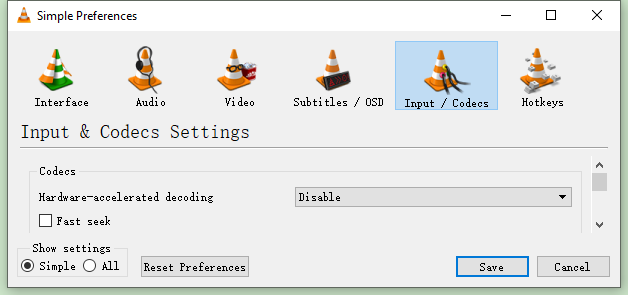
VLC is an excellent media player that can convert your DVD into digital files, but it’s not meant to rip DVDs. We’ve tested ripping various DVDs with the latest version of VLC (including the nightly builds), and the results are not quite satisfactory. If you want to rip your DVD movies and TV shows with correct subtitles, audio and no quality loss, the best solution is to use a more reliable DVD ripping program, such as iFunia DVD Ripper.
iFunia DVD Ripper is a professional yet simple DVD ripper that supports commercial DVDs, homemade DVDs and even damaged/scratched discs. Unlike VLC, it displays DVD titles on the interface and lets you rip them all in batches. It supports hundreds of output formats and preset profiles for TVs, smartphones, software and more, allowing you to enjoy DVD content on various devices.
1. Download and install iFunia DVD Ripper on your Windows or Mac computer.
 Free Download Windows 11/10/8/7
 Free Download macOS 10.11 or later
2. Open the DVD ripper and drag your DVD to the program interface. Alternatively you can click “File” menu and select “Add DVD”.

3. When the DVD is loaded, select a desired output format from the “Convert all tasks to” list in the lower left corner.

4. Select your desired audio track and subtitles for each clip.
5. If needed, click the Edit ![]() icon in the upper right corner of each title to modify the DVD content. Here you can trim and crop the video, add watermark, and adjust brightness, saturation, etc. Click “Save” to preserve.
icon in the upper right corner of each title to modify the DVD content. Here you can trim and crop the video, add watermark, and adjust brightness, saturation, etc. Click “Save” to preserve.

6. Click the Convert ![]() button at the bottom right corner of the interface to begin the DVD ripping process. Enable the “Merge” option if you want to merge several clips into one file.
button at the bottom right corner of the interface to begin the DVD ripping process. Enable the “Merge” option if you want to merge several clips into one file.

Chloe LEE is good at explaining and solving complex technology problems to her readers. Since joining iFunia Studio, she has focused on writing articles about video and DVD software, and how-to tutorials.